YouTube Tips And Tricks For Your Media
Manage episode 309677210 series 3037997
On this episode of 5 THINGS, I’ve got a few tricks that you may not know about that will help you upload, manage, and make YouTube do your bidding.
1. Upload Tricks
You probably have media on YouTube, and you probably think that after thousands of hours, you’ve mastered the ‘Tube. But there are some little-known upload tricks and workarounds, playback shortcuts, and voodoo that you may not even know that YouTube does.
Let’s start at the beginning. Let’s say you’ve got a masterpiece of a video, maybe it’s an uncle getting softballed in the crotch, maybe it’s your buddy taking a header down a flight of stairs, or maybe, just maybe it’s the cutest pet in the world. MINE.
…and the world needs to see it, right? And you export a totally-worth-the-hard-drive-space-huge-monster-master-file so you don’t lose 1 bit of quality.
And that’s OK.
Now, in actuality, it’s not the most efficient, but let’s save that existential technology discussion for another episode.
Did you know that YouTube will actually take this massive file? That you don’t need to shrink it, recompress it, or otherwise use the presets in your transcoder du jour? YouTube used to publish a page that specified video file sizes and data rates for “enterprise” grade connections. Ostensibly, this was so companies with fat internet connections could upload massive files. After all, YouTube re-compresses all files anyway. Yes, as I’ve said many times before, YouTube will ALWAYS recompress your media. ALWAYS.

“Enterprise” video bitrates for YouTube. These are 5-6x LARGER than what YouTube recommends for typical users.
But, this page was taken down.
Why?
Because accepting larger files sizes ties up YouTube’s servers, and takes longer for their transcoding computers to chomp through and subsequently create the versions you’ll end up watching. Plus, it’s a crappy experience for you, the end user, to wait hours for an upload AND the processing. Despite this, you can still do it. In the above video, you can see I have an HD ProRes file, and it’s several GB. As I select the file and start the upload, YouTube tells me this will take several hours. That sucks. However, uploading a less compressed file means the versions that YouTube creates will be based on higher quality than the compressed version you’d normally export and upload from your video editor or one that you’d create from your media encoder.
So what would you rather have…a copy of a copy of your finished piece? Or just 1 copy? The less compression you use, the better looking the final video will be.
More on this here: A YouTube user uploads, downloads and re-uploads the same video to YouTube 1000 times and the compression is staggering. This is called “generational loss”.
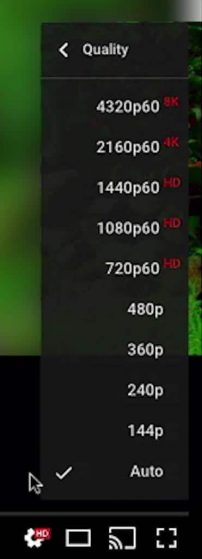
By the way, you know that YouTube creates all of your various versions, right? From the file you upload, YouTube creates the 240, 360, 480, 720, 1080 and higher versions. Are yours not showing up? Have patience. YouTube takes a little bit.
OK, back to the high res fat files. I know, the fact there is a long upload for these large files sucks, but it does lead me to the next tip. Did you know you can resume a broken upload? As long as you have the same file name, you can resume an upload for 24 hours after a failed upload. In the video above, let me show you. Here’s the file I was uploading before. As you can see, it still has quite a way to go. Oops, closed my tab. Now, I’m gonna wait a little bit.
OK, it’s been several hours, and I’m going to open a new tab and navigate back to the upload page. Now, I’ll reselect the same file. The upload picks up where it left off, and the file continues to upload.
Great for when the internet goes out.
2. Captioning Hacks
I’ve been a massive proponent for video captioning for years. Mainly for making tech information more accessible to as many people as possible, but also because it does boost the visibility of your videos via SEO, or Search Engine Optimization. Now, engines like Google not only index the tags you assign to the video but also the objective content that’s heard in the video…what’s being said.
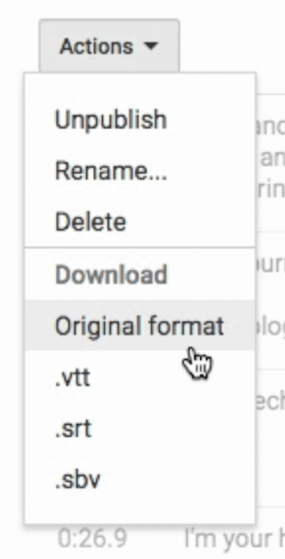
Now, YouTube’s captioning is not foolproof. If the audio recording quality is poor, or if there are a lot of slang terms or names, the auto-captions may be wrong. However, the auto-captions are a great start, because not only do they attempt to get stuff right, but they also TIME the captions for you. After YouTube does it’s best to auto-caption, you now can either use YouTube’s built-in transcript and caption editor to fix mistakes and further stylize the timing, but you can also download that same transcript and use it in your NLE, so you can have a caption file on any other platform you like.
Many other professional VOD outlets or platforms accept closed captioning as embedded captions, or even as sidecar files. This also means you can turn the text of your transcript into an accompanying blog post. In fact, that is what I do for this web series and podcast. Another hack is that if you have scripted content or a teleprompter script, you can upload that to YouTube as well. YouTube will then time the script you have against the video you’ve uploaded, and convert the script into captions…which once again, you can download and use.
As a side note, I have a tutorial on how to accomplish this very thing, turning your script into timed captions using Youtube…check it out. It’s not only a massive time saver but also a way to boost your SEO ranking and give you content for a webpage.
3. Playback Shortcuts
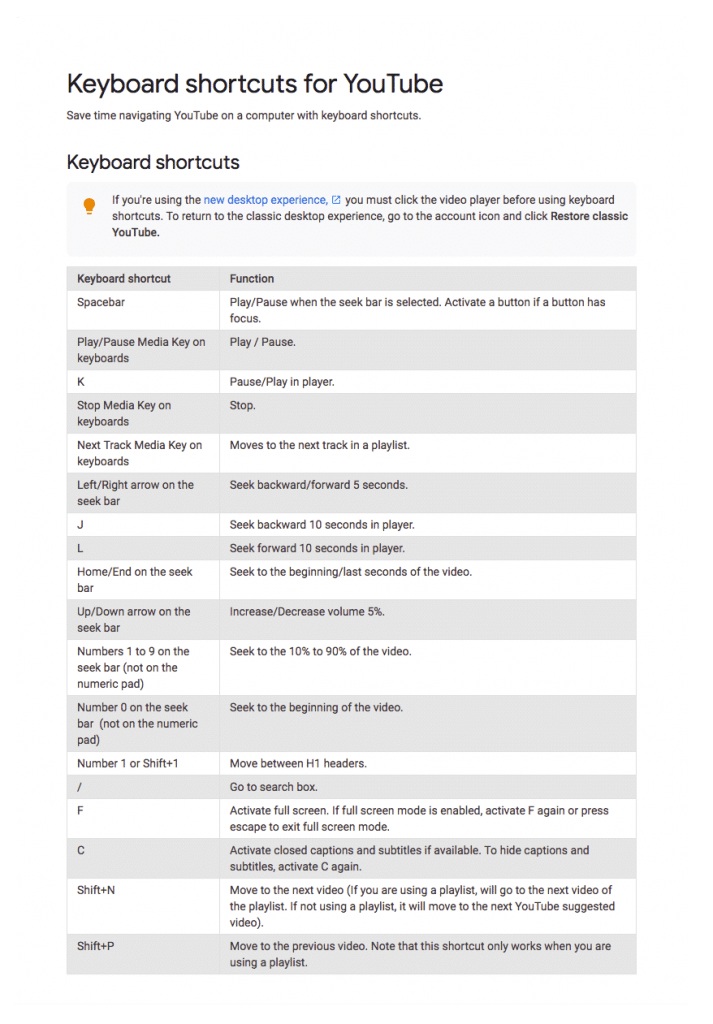
Keyboard shortcuts are your friend. The mouse is wholly inefficient and only serves to slow you down. Have no fear, the smart folks at YouTube have incorporated many of the shortcuts found in your NLE into YouTube. Let’s check some of ‘em out.
Let’s start with the old reliable “J”, “K”, “L”, or rewind, play/pause, and fast forward.
J = rewinds 10 seconds.
K = play/pause.
L = forwards 10 seconds.
What about Spacebar for play/pause? You betcha.
My favorites are frame by frame playback, especially when you’re trying to deconstruct that brand new movie trailer that just dropped, or trying to emulate and reverse engineer an effect from someone else’s video. For that, use the comma key to nudge 1 frame at a time in reverse. Conversely, you can hit the period key to do a 1 frame advance. You can also add the shift key to adjust the playback globally. Shift + the period key speed playback up 25%, and hit it again to boost playback to 50% faster. The reverse is also true for the shift + comma key combo. 75% speed, 50% speed, and so on.
Here’s a good list for you to earn some muscle memory for.
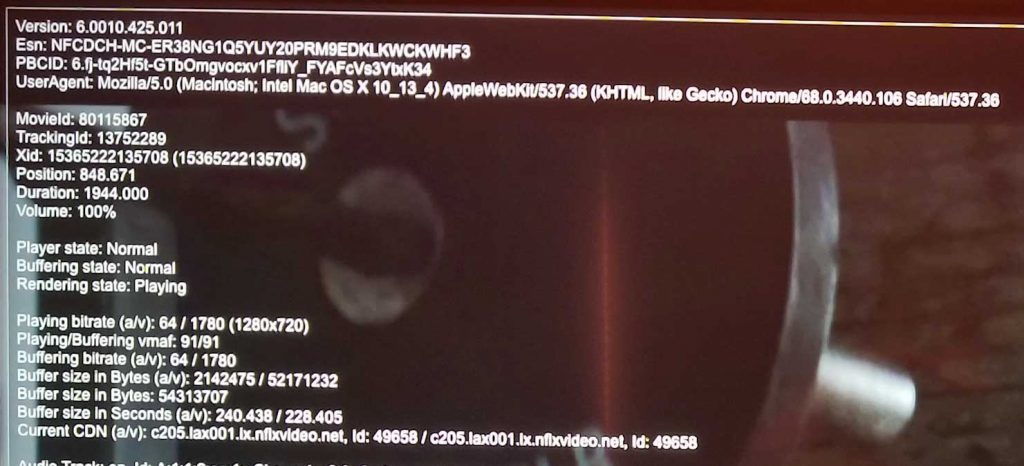
Now, if you spent any amount of time on Netflix, you’ve probably stumbled across this window, too.
Or come across this substantially more involved window: A/V Stats.
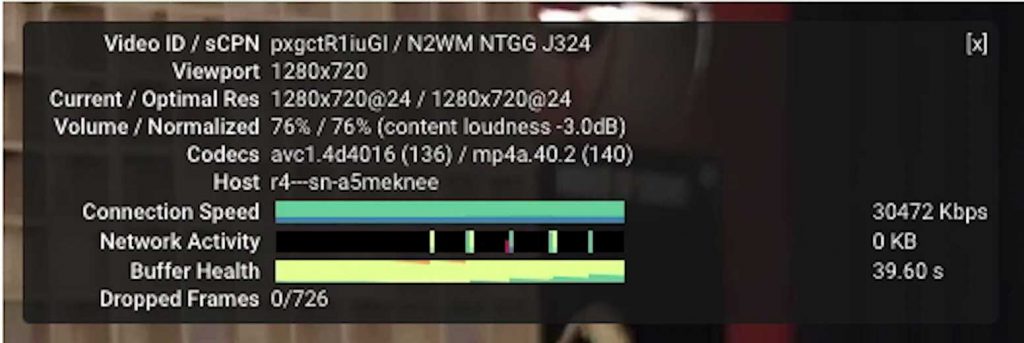
YouTube has something very similar; a handy-dandy “stats for nerds” window. When playing back a YouTube video, right click on the player window. From this menu, select “Stats for Nerds”.
An overlay window will pop up in the upper left showing you sorts of nerd goodness. This may pacify your need for numbers, but it’s also a great troubleshooting tool for playback issues. You may notice in this overlay the heading “Volume / Normalized”.
This is something very sneaky which will we’ll go into….now.
4. Audio Secrets
A little-known secret is that not only does YouTube always re-compresses your video, it also diddles your audio work. And I don’t mean just a simple transcode, I’m talking about adjusting your audio levels and sonic dynamics. More specifically, Loudness Equalization. You can see this in the last tip, when we checked out stats for nerds, this is what the “Volume/Normalized” heading is. YouTube analyses the audio present in your video and makes a determination if the volume at certain places – or overall – in your video needs to be adjusted for a pleasurable level of playback for the viewer.
In this example, you can see the first percentage is the volume in your YouTube player window, the second percentage is how much normalization adjustment is being applied by YouTube; or how much of the volume is being reduced. The last number is the “content loudness” value, which is YouTube’s estimate of the loudness level.
Now why on Earth would YouTube do this?
It goes back to something I mentioned earlier, and that’s user experience. If you had to constantly change the volume on your headphones, your computer speakers, or your TV for every video you watched, you’d get pretty annoyed, right? It’s also quite dangerous to have one video that’s very quiet, so you turn the volume up, only to have your ears blown off when the next video that plays is super loud. A variant of this is actually part of the CALM Act, which holds broadcasters accountable for the same thing.
You’re probably asking, “how can I stop YouTube from doing this to my mix?”
Well, just like avoiding YouTube from re-compressing your video… you can’t!
However, what you can do is minimize the audio tweaking YouTube does so as much of your artistic decision on loudness is retained. You can start by metering and mixing your audio using the Loudness Units relative to Full Scale, otherwise known as LUFS. YouTube doesn’t release exact values, and reports differ, but YouTube tends to shoot for -12 to -14 LUFS, so try and keep your audio in that ballpark to reduce the amount of tinkering that YouTube does. That being said, aiming for a specific integrated loudness doesn’t work, reliably. Experiment and see what sounds good to your ears.
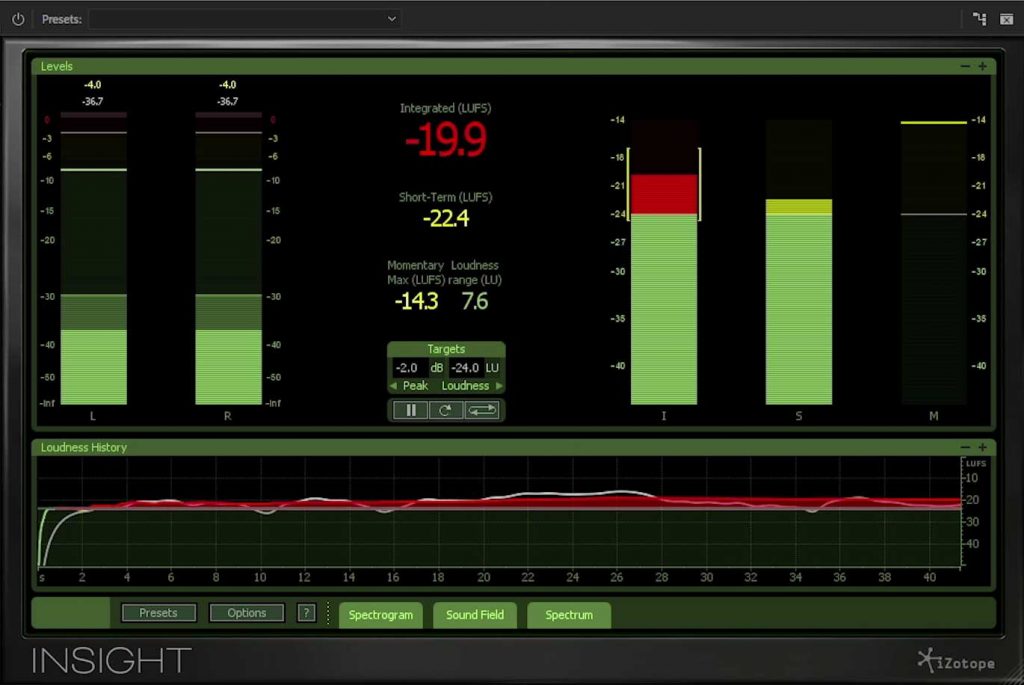
LUFS metering with Izotope’s Insight.
Further reading on YouTube, audio compression, and LUFS:
- https://productforums.google.com/forum/#!topic/youtube/JQouU5gi1ZA
- http://productionadvice.co.uk/youtube-loudness/
- http://productionadvice.co.uk/stats-for-nerds/
- http://productionadvice.co.uk/how-loud
- http://swt.audio/maximising-audio-for-youtube/
5. Advertising Tips
Now, there may be a point in time when you decide to do some advertising, or perhaps make recommendations to your friends or clients on advertising. This is where Adwords can go from simple to difficult very quickly. But what if I told you about hyper-focused marketing techniques that are not too difficult?
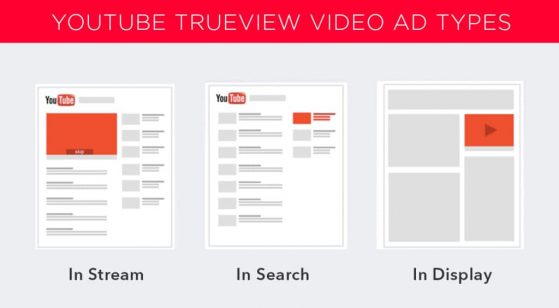
Let’s assume you know the basics of Adwords. At a very, very high level, of the kinds of AdWords you can create, are an in-stream video ad, either skippable or not, before the start of a video or, create an in-display ad, which appears as a suggested video to the right in the YouTube sidebar of the video you’re currently watching.
There are more parameters to setup within Adwords, but you basically give Adwords a budget, and that budget is used by Adwords to bid on your ad placements on your behalf against other advertisers.
You’re probably asking, “But how do I have my ads placed on the RIGHT videos?”
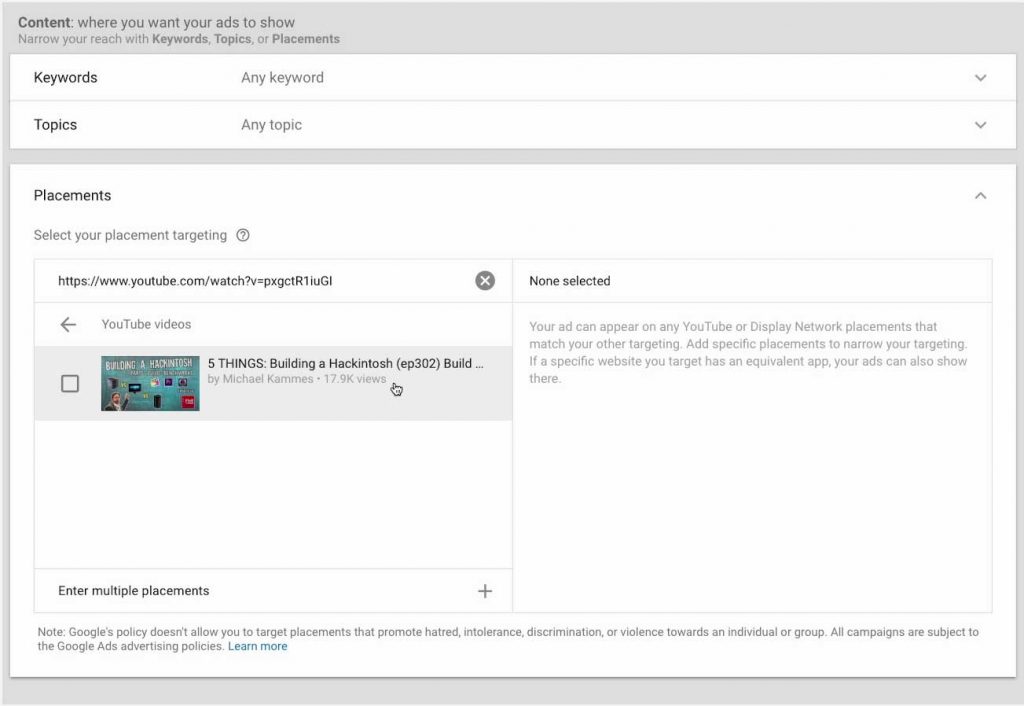
Here’s where the tricks come into play. Adwords allows you to not only bid on the general types of videos you can place your ads on, like folks interested in sports, or technology, but you also have the ability to specify what exact videos and channels where your ad is shown on. Provided those videos or channels you wanna advertise on accept monetization, you can selectively choose to advertise on them. This gives you hyper-focused marketing.
And what’s to stop you from doing a custom intro for each of the commercials you place? This allows you to speak to the exact users consuming the video and market directly to them. Think about that for a minute. You can reference the content in the exact video you’re advertising on. You can speak to the people who are watching that exact video. Instead of casting a wide net, you cast a narrow, highly targeted advertising bullet. We’re talking assassin type precision.
Do you have more YouTube tips and tricks other than just these 5? Tell me about them in the Comments section. Also, please subscribe and share this tech goodness with the rest of your techie friends. They should thank you and buy you a drink.
Until the next episode: learn more, do more.
Like early, share often, and don’t forget to subscribe. Thanks for watching.
36 episoade

